Guide for setting up an Ogre application using Eclipse 3.6 with the CDT (C/C++ Development Tools) Plugin.
Prerequisites
- Eclipse 3.6 must be installed.
- Eclipse CDT Plugin must be installed.
- The Ogre SDK version 1.7 or greater must be installed.
- Installing the Ogre SDK: Installing the Ogre SDK
- Build Ogre from source with CMake: CMake Quick Start Guide
(note that I've only tested this with a manually compiled source
version of the Ogre SDK) If you are building Ogre from source, you must
build the debug and release targets and execute the Install script for
both targets as well. This will create a directory structure that is
identical to the binary install structure.
Setting Up an Application for Eclipse 3.6 using CMake
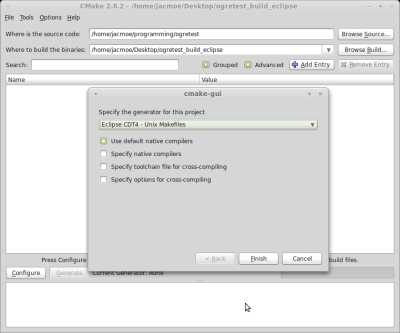
CMake GUI
Eclipse - New Project

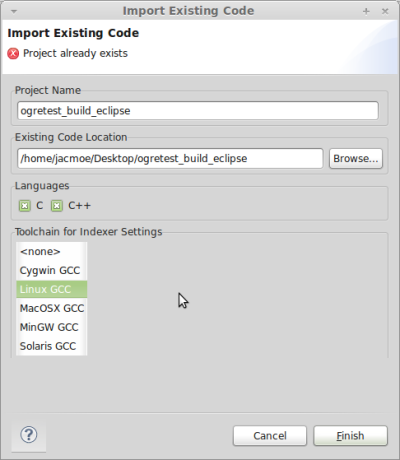
Import Existing Code
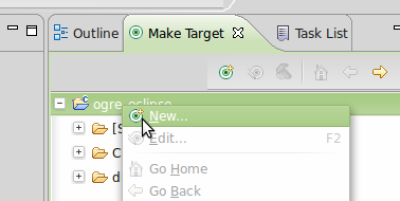
New Target
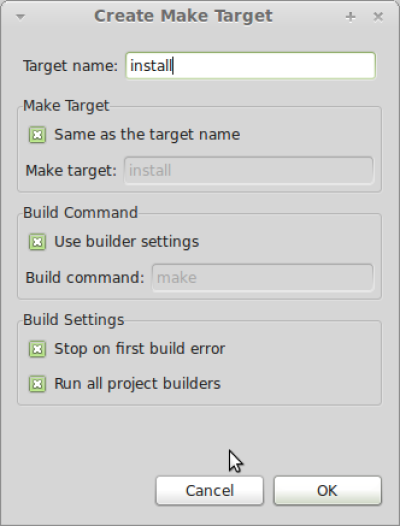
Target install
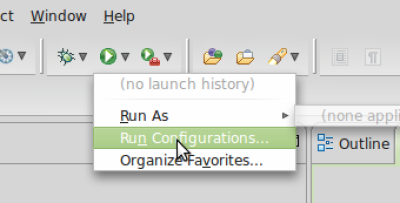
Run Configurations
Setup OgreApp Run Configuration

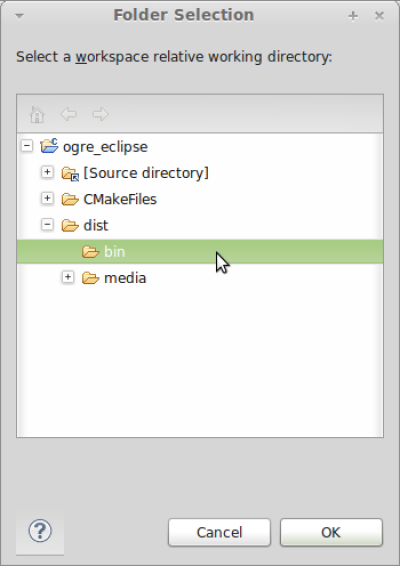
Select Working Directory
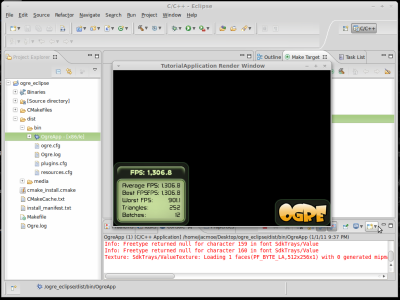
Success
Setting Up an Application for Eclipse 3.6 from scratch
New Project
Create a new C++ Project (File -> New -> C++ Project)
Make sure that Empty Project is checked, and give your new application a name (i.e. testing)
Tutorial Framework
Download the Ogre Wiki Tutorial Framework here:
No such attachment on this page
Extract Tutorial Framework:
- Right-click on the TutorialFramework.zip file and select Extract Here
A new folder named TutorialFramework should appear, with 4 files in it.
Import Existing Items to Project:
- Open up Eclipse and Right-click on your project (i.e. testing)
- Click Import
- Expand the General folder, highlight File System, and click Next
- Click Browse... and navigate to the folder where you extracted
the tutorial framework archive (i.e. /home/your
name/Downloads/TutorialFramework/), then click OK
- Click Select All or check all of the tutorial framework files that show up
- Click Finish
Project Configuration
Project Properties:
- Right-click on your project and then click Properties
Add Environment Variable:
- Expand the C/C++ Build section and click on Environment
- Click Add... to add a new variable
- Give the new variable the name OGRE_LOC, and enter the location
of your Ogre3d source folder as the value (i.e. /home/your
name/workspace/ogre_src_v1-7-1)
Add GCC C++ Compiler Include paths and GCC C++ Linker Library names:
- Again under the C/C++ Build section, click on Settings
- Click on the Tool Settings tab
- Under the GCC C++ Compiler section, click on Includes
- To the right, click on the Add icon
- Enter ${OGRE_LOC}/OgreMain/include as the Directory and click OK
- Add the following directories like you did the previous one:
- ${OGRE_LOC}/include
- ${OGRE_LOC}/Samples/Common/include
- /usr/include/OIS (Note: the OIS package may be installed
somewhere else for you, so double check that this directory exists. If
you can't find it under /usr/include/OIS, check /usr/local/include/OIS
(I believe this is the default installation directory))
- Now, under the GCC C++ Linker section, click on Libraries
- To the right, click on the Add icon for Libraries (-l)
- Enter each of the following libraries (hit OK after each one to enter it, enter each one separately):
- OgreOverlay
- OgreMain
- OIS
- boost_system
resources.cfg and plugins.cfg
Make sure you have the resources.cfg and plugins.cfg files in your project directory.
That's it!
You've set up an Ogre project succesfully.
All that remains is to build and run it. 
![[toggle]](Setting%20Up%20An%20Application%20-%20Eclipse%20-%20Linux_files/module.png "[toggle]")